Little C's - The Greeting Farm Release, Stamp Giveaway and Templates!
 Hi Friends! Before I begin. . .just a warning this post will be long because there are lots of things going on! LOL! I'll go straight to business. . .first of all Jen the owner of Pieces of Me is having a prize giveaway to celebrate the Greeting Farm stamp release at Little C's. Stop by and check out what is going on at her site.
All the Greeting Farm images on my projects are sold at Little C's. ..be sure to grab them while they are still available. For the first box, I used a template that I posted a few weeks ago. Click Here for the template.
I colored all the images using my Copic Markers so I'll just say it once. . .:)
Please read. . .do not print the templates directly from the Internet. I'm not sure how large it'll print! Save the template by clicking on the photo, right click and "save image". Resize the template using your photo editor before printing or SCAL2 program if using a Cricut Machine.


Quickie instructions:
- When cutting the template using SCAL2, upload using the autotrace feature.
- Adjust the size of the box as desired and to fit the star appropriately, measure the width and height of the box when you've assembled it before cutting the star. Adjust the "width" and "height" of the star on SCAL2 based on your box measurement so that it'll fit nicely in front of the box.
- Measure the depth of the box (side of the box) and cut a strip of designer paper at 12" and the depth of the box to create the handle


Hand Cut Template
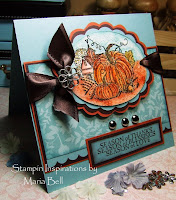
Create a card based on the size of your envelope.
If any parts of this post or instructions don't make any sense to you, please feel free to email me. LOL!
Hope y'all have a beautiful weekend!


11 comments:
oh goodness...I am going to have to learn to use my SCAL...what fun creations!!!
i love your work! :)
Hi Maria,
Beautifull boxes and cards!
Thanks for the template's ;)
Greetings Anneke
Great projects! I love your creativity and all of the detail you add to each project. Fabulous!
Wow - Maria - you sure have been busy. Love them all.
xo
tina
What a little busy bee you've been, Maria! These are gorgeous boxes and so sweet of you to provide a template - thank you! You are such an inspiring woman to all of us - thank you! ;D
thanks for sharing your beautiful work, and templates! I love what you do with the white gel pen to really make the images come alove, I will try that trick for sure;)
Hey busy girl! Fabulous projects! Love what you did with these cute images. Great shapes and colors! :o)
These projects are so amazing, it's unbearable!
Girl you sure have been busy :), All of these are fabulous.Each one is unique.
Wow Maria your cards are absolutely beautiful!! I love stopping by your blog just to see your work!
Post a Comment