Wednesday, July 30, 2008

Beautiful RAKs from Beautiful People

Hi Everyone!! Oh my. . .look what I received!! Happy mail from two talented and wonderful ladies. . .Mel of "Mel Stampz" and Malieta of "Life's Simple Pleasures"! Wow!! I am so lucky to have met such wonderful ladies through blog land!

The picture above is a RAK of a whole bunch of RAK that I received from Mel. Oh my goodness! I was so shocked when I opened the package because wow!! there were so many awesome stuff inside!

Mel have become my "creative muse". I mean, seriously! I visit her blog site daily and I cannot begin to tell you how inspired I've become . She comes up with so many creative ideas using various materials that other stampers don't use. In the past year, I've been sort of in a creative rut. I've become lazy and through time have had less and less interest in trying out new techniques and come up with new ideas for projects.

Since being a regular blog reader of "Mel Stampz", well. . .Mel's work has rejuvenated my interest in technique driven card creations. I've become more interested in using art mediums to my work and to step outside of the "stamping" world and incorporate a bit of the artistic aspect to this art.

As you can see by the stuff I received from Mel, it's no wonder that her work is so inspiring!! This mini purse is covered with beads! Whoa!! It's awesome! Surprisingly, the beads are adhered really well on to the the cardstock!!! I need to ask her what type of glue she uses because not one bead fell off so far!! LOL!! This mini purse is absolutely GORGEOUS!!


Okay, the picture of this card don't do justice to the card. In real life the colors are more vibrant and just a beautiful card.

I just love the unique card jacket. If you visit her blog site, she has so many different and unique ideas that you'll be spending a lot of time going through all her tutorials and links that she provides.

Again, I need to find out what type of glue she uses because those buttons are seriously adhered to the cardstock!


This is the card inside of the jacket! It is so pretty . You can't see it but the colored images have pretty sparkles. The card has so many different details such as the mini beads on the flowers, the negative punched flowers, the unique ribbon tie. . .everything so creatively detailed. It's such a beautifully gorgeous card!


Last but not least, this is the gift she gave me! WOW!!! Sooooooooooo much goodies!!! My daughter said "wow, mom, she really gave you a lot of stuff!!" Okay, she was not kidding! LOL!

Oh, Mel you are too generous! I couldn't believe all the stuff you had sent me. It must have cost you a bundle! Thank you so much for your generosity! I will definitely use the goodies you sent me. I really love all of them, especially the handmade embossed paper that you created. It's really awesome to see the actual stuff that you show on your blog. It's more gorgeous in person. I cannot begin to express how grateful I am for the stuff you sent me. Again, thank you for being so kind!!

This is a RAK I received from Malieta of Life's Simple Pleasures. Like Mel, I met her in blogland! Malieta is also a very inspiring artist! She is not only a creative artist, she is a very sweet and wonderful person. Since I've known her, she has been such a giving person. I've received several RAKs from her since we've met!

Furthermore, not only is she a kind person, her card creations are BEAUTIFUL as you can see by the card she sent me. I love how she colors with Copic Markers. Her coloring with this medium is one of the best in blog land. You definitely need to visit her blog site to truly understand what I am talking about!!

Thank you so much Malieta for always being thoughtful and for becoming such a wonderful friend!! I appreciate your beautiful card. . .it definitely put a happy smile on my face!!


post signature

Tuesday, July 29, 2008

Jen's Little C's Weekly Challenge #2 and Sneak Peek of My Craft Room

Hi Everyone! Am I back? Not really. . .I'm still in the process of putting my craft room back together but I did take time off from my cleaning for Jen's Little C's Weekly Challenge #2!! I also wanted to announce that I'm part of Jen's design team for her online store "Little C's Stamps n' Things". Whoohoo! A link to her store is also located on my left sidebar!!

I have to commend Jen for taking on the challenge of opening her own store. She's a regular gal, like the rest of us. Although I know Jen is special, what I mean by "regular gal" is that she didn't start off designing for a big stamp or scrapbook company and decided to branch off on her own. She is a stamper, a blogging gal, you know. . .like us and she decided to take the chance and open up her own online store!! Yipee!!!!!!

Okay. . .we gotta support gals like Jen because if she is successful, it opens the door for others. . .like you who may want to one day do something similar. Furthermore, it gives us more shopping options and who doesn't need more options, right?!! So be sure to stop by her store and check out her fabulous products!!

Oh, my gosh. . .we just had an EARTHQUAKE! I just returned from running out of the house!! We had two large tremors right when I was typing this post. My room started shaking in my craft room and I immediately knew it was an earthquake. The house felt like a huge truck hit the house!!

Wow, I just heard on the news that there was a magnitude 5.8 earthquake near Chino Hills near LA! Okay, if we felt it here in Temecula, that was a HUGE EARTHQUAKE!!! Temecula is close to 100 miles from Chino Hills! It's NUTS!!

Okay, enough of the excitement and back to LCWC #2. I created my card using one of the stamps sold at Little C's. It's a "Rachelle Anne Miller Lilo & Milo Clear Stamp" Oh, my gosh, this stamp is WAAAAAAAAAY Cute!!!

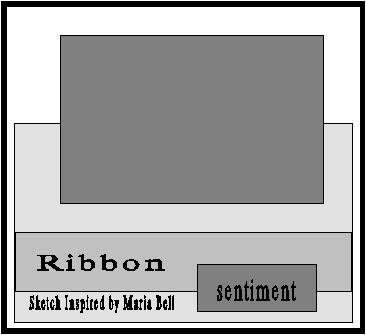
The challenge is to create a card using a sketch by Julee Tilman of Poetic Artistry. The sketch is below!

I colored the image using my Copic Markers, cut out a few parts of the image and mounted them with foam tape. I also added a bit of Stickles.

Anyway, if you want to participate in Jen's challenge, stop by Jen's blog site "Pieces of Me"! Love to see ya' playin'.


Check out the other card samples for Little C's Weekly Challenge #2:

Risa - Life's Simple Pleasures
Teri - Big Ideas From A Little Girl
Jean - Stamping Spot Studio

Jen - Pieces of Me


I wanted to post a sneak peek of my reorganized craft room! I wanted to post a few pictures before I start messing it up again! LOL! My room is not quite finish. I'm about 70% done. I still need to bring back a bunch of my stuff into my room and I bought a few decorative elements for my room which will be delivered in about a week. I'll re-post more photos when my room is completely done!

The picture above is a "buffet" table that I transformed into a work station. I actually bought it from a scrapbook store that was going out of business. It's made of real wood and it's a wide table so there's a lot of drawer and shelving space. This station will be where I do all my die cuts and cutting. My hardware tools are located in one of the drawers. The shelves are still empty because I still need to figure out what I need to place in it.

Do you see that grid panel to the left of the table? It's a slat display that I bought for $15 at the same scrapbook store. In a store, it's used to hang stickers and such. I still need to buy a bunch of hooks and my plan is to hang a few packages of stickers like a store!! LOL!


This is one of my stamping station! I have two craft tables! This one is where I'm going to do my heat embossing and other stamping activities. I have another craft table that I'll be using for my scrapbooking and altered projects!! I'll take a picture of it next time!

The craft table is a true stamping table. . .the drawers are 1" and 2" in height, made specifically for rubber stamps and stamping products. I bought it about 2 years ago at "Best Craft Organizers" The table is on sale right now for $299 including shipping. When I bought it at the regular price, it was $500 so buy it now while it is on sale!


This is my craft table with the drawers opened. The drawers store my favorite stamps as well as all of my punches!!

I also have my TV on my table! LOL! I can watch TV and craft at the same time. Yipee!!


This is an armoire to the right of my craft table. This armoire stores my embossing folders, sewing machine, bind it all, Combs binding machine, and other sewing stuff! This armoire was originally my daughter's computer armoire that was located in her room.


This is the cabinet opened up!


This is a small craft drawer located to the left of my craft desk. It's a stamping/scrapbooking organizer table that I also bought from "Best Craft Organizers" It sores a few of my stamps as well as a few scrapbook papers.

I'll post photos of my complete craft room once I receive the decorative elements that I bought for my room and after I finish reorganizing everything!!

Now back to my reorganizing!! LOL! Hope y'all have a wonderful day!!

post signature

Sunday, July 27, 2008

Jason Mraz's New Video - I'm Yours


Remember a few months back, I posted a live version of "I'm Yours" by Jason Mraz. before it became a single . .well, the official video is out and it's the first single on his album! Whoohoo! I knew it was going to be hit. I loved the song the instant I heard it!

I guess in gratitude for posting the live version of his new song on my blog he decided to film the video in Hawaii, where I'm originally from. LOL!! I knew it was Hawaii when I saw the video and after watching an interview, he confirmed it! I miss "home" so whenever I watch the video, it just makes me feel good and to top it off, he is singing my favorite song.

I have a little bit of connection to Jason Mraz. . .LOL! It's true. . .he. actually lives right in the next town from where I live. . .about 15 minutes away, a town called "Rainbow". It's an avocado farming town in San Diego and Jason has his own avocado farm. What do you think. . . should I drop by and visit him one day. . .maybe ask him for a few avocados? LOL!

I'm still in the middle of reorganizing my craft room. I say, give me 3 more days and I'll be completely done but don't quote me! It's a painful process and remind me NEVER to do this EVER AGAIN!

Anyway, here is another "live" video of Jason Mraz. . .remember the song "the Remedy" way back several years ago. Did you know that Jason wrote the song for his friend who was battling cancer? In an interview, he said that his friend was always hopeful and had such a positive attitude despite his illness that it inspired him to write this song for his friend. Awww, how beautiful. Anyway, here is the video:


Here is a live version of "I'm Yours". It's AWESOME:


I'll be back soon!! Hope y'all had a wonderful weekend!

post signature

Wednesday, July 23, 2008

Blog Break - I Demolished My Craft Room

Oh no, Maria! "What happened to your craft room?", you ask. Well, here's the story. . .

Yesterday my DH was mad at me and to get back at me, he began moving all of my craft stuff scattered all over the upstairs hallways downstairs into the garage. Just FYI. . .we have two long hallways upstairs and linen cabinets lining one side of one of the hallways and I've taken over all of them. Okay, typically, NO ONE MESSES WITH MY STUFF! I mean NO ONE!! I will go into a murderous state if you do!

I think my husband thought I was going to have a fit but NOPE! I had taken Claritan for my allergies earlier in the day and my head was all fuzzy. . .I was sort of in a daze all day so as he was bringing down my stuff, I just sat on the sofa and stared at him. No reaction whatsoever from me. Which by the way surprised him! LOL!

All I did was just watch him walk up and down the stairs for a countless amount of times then something went off in my head. . .you know, "ding, ding, ding"!! I thought, since he was moving my stuff into the garage, this would be the perfect time to clean out my craft room and reorganize it. I mean completely clean it out and start from scratch!

So. . .as my husband continued to work his butt off thinking it would somehow bring me to plead and beg for him to stop. . .instead, I offered to help him! LOL! Screeeeeeeeech! That stopped him in his tracks. After he realized that I was actually HAPPY that he was moving my stuff out, well. . .you know what happened. . .he stopped moving my stuff out and went into his office and started playing a video game!

What the heck? I should have kept my mouth shut!!! Well, I decided to ask my daughter to help me clean out my craft room but after awhile, my husband started to feel bad so he began helping us. He asked me what my plans were and I told him that I wanted to reorganize my craft room. He then offered a "budget" and said I could buy shelves and cabinets for my craft room so I can store my stuff.

Although I appreciated the offer, believe it or not, I declined. You're like "WHAT!" Honestly, I don't want more shelves and cabinets in my room. I want my room to be "pretty" and not turn it into a storage area for all my stuff. I'm tired of the clutter. . .it disturbs me. I want to be able to breath and relax in my room. I did ask that my husband to buy shelves for the garage so I can move 75% of my stuff into the garage rather than keeping them in my room.

All I want is a nice, clean space where I can actually move around so I'll be on a blog break for a few days. I've already cleared my room and everything is in the garage so I'll be going through my stuff and bringing up the essential stuff. Storing the rest of the stuff in the garage can be a slow and easy process. I don't want to spend weeks not being able to do anything so my goal for the next few days is to just bring up stuff that I use on a daily basis so I can be back in business in a few days!!!

I'll take pictures when I'm done! See y'all later!

post signature

Monday, July 21, 2008

Little C's Weekly Challenge #1 Card


Hi Everyone! I made this card for Jen's Little C's Aloha Weekly Challenge which started this week! The challenge is to follow a sketch that I posted about a week ago on my blog site. The sketch is provided below.

Jen will have weekly challenges from Tuesday through Sunday if any of you want to join in the fun and participate!

If you want to join in the challenge, check out Jen's blog site Pieces of Me for the details!

Here are a few other challenge card samples created by these talented ladies:


A few details about my card. . . .

I colored the image using my Copic Markers and added a bit of Stickles to glitz up the flowers a bit. To create a bit of color to the background, I rubbed SU Barely Banana and Red Rose ink using my sponge dauber.
I used SU Ticket corner punch to the corners of my cardstock and matted the image with SU Rose Red and Barely Banana cardstock.


To create the sentiment, I took a medium sized prima flower, adhered it to the card and with a foam tape layered the circular sentiment. To create the circular sentiment, I used SU 1" and 1 1/4" circle punch and the Word Window Punch.
Card Details:

Stamps: Inkadinkado

Paper: K&CO designer paper, SU Rose Red & Barely Banana

Ink: SU Rose Red & Barely Banana, Copic Markers

Accessories: Prima flowers, SU 1" and 1 1/4" circlue punch, paper piercer, foam tape, SU Ticket Corner Punch, Organdy ribbon, JoAnn brads

post signature


Sunday, July 20, 2008

Another 3x3 purse/box project!


Hi Everyone! I think this will be the last 3x3 purse/box project that I'm going to make for now. I've been working on templates and tutorials that Mel of Mel Stampz has on her blog site and well, she has a lot of other awesome stuff so I'm going to move on to another project!

I think I'm going to make it a weekly thing! I'm going to find a blogger each week who provides tutorials and templates on their blog site and try their projects out! There's so many wonderful bloggers like Mel who really provide a service to us by sharing all their creative ideas so I want to highlight their blog sites!

Well, this was 3x3 box project that is linked on Mel's blog site but I don't know which one of the many that she linked that this particular box came from. Argghh! I was clicking and clicking on the links and when I found this one, I printed the template. I went back to figure out which link it came from and I couldn't find it.

Anyway. . .the 3x3 boxes/purse templates are fairly similar to one another. . .the orientation may be different but the overall template itself are quite similar. I liked this one because this box actually can fit up to eight 3x3 cards and envelopes.

The card design to my cards are simple because I had to make six cards and I didn't want to spend my day just making this one project. Creating the cards were really fast. . .for all six, it took less than an hour. These box projects are very easy to make. . .the only thing I don't like is cutting out the envelopes. . .I don't have 3x3 envelopes so I have to create the envelopes myself. I used the same template as the one that I used for the previous purse project I made yesterday. Scroll down for the envelope template.

Again, thank you Mel for providing all the fabulous links to these wonderful 3x3 box/purse projects!! Be sure to stop by Mel's blog site . . .she has a cool project and tutorial using transfer tape!

Project Details:

Stamps: Inkadinkado
Paper: K&CO designer paper, SU Rose Red, Barely Banana
Ink: SU Rose Red, Versamark Ink
Accessories: Organdy Ribbon, JoAnn Brads, Clear Embossing powder, round corner punch, Fiskar Scallop Border punch


post signature

Saturday, July 19, 2008

Mel's 3x3" Purse Box


Hi Everyone!! I decided that this coming week I'll work on a few of the fabulous templates and tutorials that Mel of "Mel Stampz" post on her blog. She list links to various projects as well as create her own great tutorials and templates. I know how much work it is to put together tutorials so in appreciation of all her efforts, I'm going to work on a few of them!

Stop by Card Inspired and check out the other purse project that I created. The one posted on Card Inspired is a template by Stacey from SCS that Mel linked on her site. The purse above is one that Mel created herself which I love!! You can find the template on Mel's blog site: Click Here. For the envelope, I used Stacey's template that Mel linked on her site. It's the same one that I used for my card and envie on Card Inspired. Click here for the envelope template. I used designer paper to create the envelope rather than a plain cardstock or paper. I like how it matches the card and purse!

Thanks Mel for all your hard work!

A few details about my purse. . .

Stamp: Inkadinkado
Paper: Autumn Leaves, Beige cardstock (unknown)
Accessories: SU 1 3/8" circle punch, SU scallop punch, Craft button, Embroidery floss


post signature

Thursday, July 17, 2008

Watercoloring with SU Markers and Twinkling H2O


Hi Everyone! Lately I've been making a lot of square cards because I've been using large stamp images.

This time I decided to color my image using traditional watercoloring methods. I did mix two mediums - SU Markers and Twinkling H2O. If you don't have a lot of Twinkling H2O colors, you can mix it with regular colors by layering over one another. I do recommend applying the regular watercolor first then apply a layer of the Twinkling H2O because you want the sparkle of the Twinkling H2O to show.

With this card, I stamped the image twice and layered parts of the image over one another to give it a 3D effect. It's just a fun way to give your cards dimension. It takes a bit of work to cut the image but the end results are worth it. Don't you think?
Card Details:

Stamps: Flower image (don't know), SU Much Appreciate (sentiment)
Papers: K&Co designer paper, SU Barely Banana, Rose REd
Ink: Twinkling H2O, SU Markers
Accessories: JoAnn Brads, Walmart ribbon, Paper Piercer, SU Key Tag Punch, Stkckles


Wednesday, July 16, 2008

Pearl Ex and Pastel with Future Floor Finish Tutorial


Hi Everyone! Do you still have your Pearl Ex somewhere in your drawer or closet? I don't see too many people using it now a days! I have loads of them! I used to use them a lot but sadly, I've moved on to other coloring mediums that I've neglected to use my Pearl Ex. Unfortunately, when Pearl Ex was really popular 3 to 4 years ago, I bought tons of them thinking that I'll run out and I needed every color in the largest container possible. Ha!!

Every 6 months there seem to be a new color medium and I can't keep up! My problem is I don't just buy a few of whatever is "in" at the moment, I buy the mega sets, KWIM? Well. . .I decided to start using my stuff, even the old stuff because art is art. . . it never gets old even if there's new stuff out in the market.

So. . .today I decided to use my Pearl Ex. Remember how cool it was to use the Pearl Ex with Future Floor Finish! Wow, that was such an innovative way to use the Pearl Ex. For those who've never heard of this technique. . .well, because Pearl Ex comes in powder form, you need a medium to "bind" and liquefy the Pearl Ex so you can paint with it. Future floor finish has an acrylic base that works perfectly to "hold" or "bind" the Pearl Ex so that when it is applied, it won't rub off.

Typically, you would use something like Versamark ink or Embossing ink to "hold" the powder and spray it with a sealant so it won't rub off. But with these mediums, you can't exactly "paint" the Pearl Ex on to your cardstock. Well, some one out there in artsy land came up with the idea of using this floor finish. I wonder if there's a chemist/artist that sort of sits in their laboratory and come up with these sort of stuff! LOL!

If you like the shimmery effect of Pearl Ex but would like to have more flexibility and be able to paint with this medium.. . .well, check out my tutorial. It's not a new technique but I did add a little twist to this technique. I added pastel to the mix. . .it's used to creating the shading and highlighting that you really can't do with the Pearl Ex.

Pearl Ex works best with darker cardstock. It "shows" better for some reason. The results with this technique usually has an "artsy-fartsy" look to it.

Anyway, check out the tutorial and tell me what you think!


post signature

Tuesday, July 15, 2008

Sponge Dauber Coloring Card

Hi Everyone! Just a card I made coloring with a sponge dauber. My sponge dauber is my best friend. LOL! It's my favorite color applicator because I can color images really, really quickly. Obviously, coloring with a sponge dauber will not result in detailed coloring but it helps to cover a large area in short order! I also love blending different colors and creating layers of colors like I did with my card.

I rarely use my SU wheels because many times, the images are tiny and there's a lot of image to color. I don't want to just stamp the image as just outlines but I'm too darn lazy to color the images individually. I'm about quick and easy! LOL!

Anyway. . .I rolled the wheel using black ink then colored the images with SU More Mustard and Real Red by swirling and rubbing the color on to the white cardstock. I also applied Stardust gel pen on to parts of the image and the sentiment. Nothing much else to the card.

Card Details:

Stamps: SU Bitty Bugs Wheel, CTMH Thing of Beauty
Paper: SU More Mustard, Real Read, Black
Accessories: Fiskar Scallop border punch, sponge dauber, Making Memories ribbon, Gelly Roll Startdust Clear pen

post signature

Embossing Resist Card


Hi Everyone! Just another card I made using the embossing resist technique. I posted a tutorial on my previous post on this old technique but I added a crayon twist to it. With this card, I didn't add any crayons because the images are too small.
I'll make a few more cards using this technique and then move on. I'm trying to come up with different techniques so I can use my different materials that I have. I tend to go the easy route and use materials that I can create a card easily and have been sort of neglecting a lot of my stuff.
Techniques are time consuming so for the past year due to time constraints, I haven't really been experimenting. I primarily colored my image, slapped on a designer paper, and finished up a card but I feel bad that I have all these materials that are not being used.

Anyway, if you the time, scroll down to my previous post and check out the tutorial. Hope you like it!
Card Details:

Stamps: CTMH Joy Forever, SU Dots & Daisies
Paper: SU Old Olive, Bordering Blue, River Rock
Ink: Versamark ink, Bordering Blue, Certainly celery
Accessories: Craft buttons, White embossing powder, sponge dauber, Fiskar scallop border punch

post signature

Multi-color Crayon/Embossing Resist Tutorial


Hi Everyone! I have been trying different ways to create my own background paper because I tend to use designer paper a lot and I want to utilize my stamps for more than just the primary image. The only thing I don't like is having to color a lot of images especially the non-bold type of images when creating my own background paper.

Well. . .here's an easy way to color your background using an old technique with a little twist. I call it multi-color crayon/embossing resist because rather than just using white crayon, you use different color crayons and mixing it with heat embossing, you can color your background using dye or pigment with a sponge dauber. It's a fast an easy way to color your images. It's especially fun to color flower images.

This tutorial uses white embossing powder but you can use different color embossing powders depending on the color effect that you want!! The crayon portion creates either highlights or shading to your images depending if the crayon color is darker or lighter than your ink color. Try different color crayons and see what you end up with!!


Card Details:

Stamp: Stampin Up Basic Outlines, Small Script
Paper: SU Pink Passion, Cameo Coral, Wild Wasabi, Versamark ink
Accessories: Making Memories ribbon, Hodge Podge Hardware Pewter, Crayon, White embossing powder


post signature

Monday, July 14, 2008

Intermission. . .Blogger Acting Up!

Darn it! Blogger is acting up and I can't post photos of my card. I'll try again tomorrow! In the mean time. . .if you've been reading my blog for a while, you would know that I love "alternative music". . .I love "Taking Back Sunday" but I think they suck live! LOL! Some bands are just not good live. I can name a few that I've seen in concert and they sound horrible in concert!

Anyway, I do like this song by Taking Back Sunday called "Make Damn Sure". It's an old song but I still like listening to it.

post signature

Saturday, July 12, 2008

Twinkling Sunflower Card

Hi Everyone! This will be the last "Twinkling H2O" card for now. It was fun working with this medium. Be sure to scroll down to my previous post for the tutorial on how to color with the Twinkling H2O.

My background looks a bit messy but that's okay. . .I think it gives it "character"! LOL! I had colored this image in dim light while watching a movie on Friday with my family so I really couldn't see the results until I brought it up to my craft room. I actually like the messy look to it but it's a good idea to color your image in good lighting.


I added a little Stickles to the center of the sunflower. I love using Stickles.
Anyway, I hope you are having a wonderful weekend!

Card Details:

Stamps: PSX, Inkadinkado
Paper: SU Brush Blossoms, More Mustard, Provocraft paper
Ink: Twinkling H2O
Accessories: SU Key Tag Punch, Paper Piercer, Stickles, Pebbles, Inc (ribbon)


post signature


Related Posts Plugin for WordPress, Blogger...
 
Share |