Showing posts with label Mini Scrapbook Album. Show all posts

Thursday, May 16, 2013

Mother and Daughter Mini Scrapbook Album


I'm in the process of cleaning out my garage and while looking through a few containers I found an unopened package of a Close To My Heart Mini Scrapbook Album and sticker embellishments.  I initially thought of selling them but decided to create a mini scrapbook album instead.


I don't like to scrapbook often because most times it takes me several hours to finish which I don't like.  I like to start something and be able to finish it and that's primarily the reason why I prefer to make handmade cards.  But I decided to work on it and surprisingly I finished within an hour or so. 


I usually feel I have to come up with something creative for my scrapbook page design but I decided to just wing it.  I just stuck the photos, stickers, designer papers, and embellishments without any real design concept.  I didn't try to think too hard or I would never finish.

I used Stampin Up designer papers and the stickers are by Close To My Heart.


The pictures are just a collection of photos that my daughter and I took this past year.  I didn't really think about what photos to use.  I just chose whatever photo was in one of the picture files I had.  Most of the pictures were grabbed from my Facebook profile.  It was much simpler than having to look through numerous photos I have on my computer.


As you can see, nothing special about my design layout.  I just sort of stuck the stickers on. 


This is my daughter's photo from her Facebook profile. . LOL!  I like this picture of her.
When I finally figure out what craft stuff to sell I'll let you all know.  Right now I'm looking through containers and sorting through them.  My goal is to sell at least 1/2 of all the craft stuff I own.  I hope I don't waiver from this goal. . .LOL!  I sometimes start getting second thoughts when I think of selling them.
Anyway, that's it for today.

Etsy Shop: Inspired & Unscripted
Like my Facebook Page
 

Wednesday, October 20, 2010

Halloween Gate Fold Double Accordion Mini Album Tutorial

Hello Friends! Sorry for the poor quality of the photos but I created this project over 2 years ago! OMG! I created the tutorial for a Stampin Up club I had a while back but I no longer have the club. I have a lot of tutorials that I have not transferred to this blog. The tutorials were stored on a website that I no longer pay for and well, I have to reconstruct the tutorials so that I can upload them to Scribd. Unfortunately, I am way to lazy or burnt out to reconstruct them all! LOL! But, I decided because it's a Halloween project, this would be a good time to post this tutorial.


The mini album opens up as a "gate-fold" and is held closed with Velcro on the back of the oval panel. The oval is actually optional and you can wrap a ribbon around the album to keep it in the closed position but I prefer the Velcro option.

When opened up, the pages alternate from left to right. It's just a fun way to view the pages.

As you can see the pages are laid out in an alternating fashion. I decided to add a bunch of Halloween photos that I took in the past of my husband and kids. This project may appear "complicated" or "difficult" to create but it's actually quite easy. It's not exactly a "quick" project but try it out anyway. After the first album, it gets a lot easier to create a second one. . .:)

I'm really sorry that I don't post daily on my blog anymore. I'm not sure what my future will be with this blog. I was thinking of taking a few months break after the new year starts but like everything in life, I always change my mind. There was a time when all I wanted to do was create, share, blog and create tutorials but I don't know, I think I'm burning out a little bit with paper crafting. Maybe a few months break will bring back the old feelings. I don't know. . .do you sometimes feel the same way?

I know of a lady who was crafting (wood cut/tole painting) for 25 years and she recently put all her craft stuff on sale. I went over to buy a few things and she had literally a thousand craft books, tons and tons of wood cuts for the tole painting, and a whole bunch of other craft items for sale. I asked her why she was selling all her things and she said that she suddenly. . .almost overnight just no longer had any desire to craft which for me is quite amazing. I still love crafting but I want to grow into other areas of crafting such as crocheting and sewing so maybe that's where I'm heading. .. I don't know. I still love paper crafting and don't think I'll ever stop doing it but I'd like to explore other craft areas. I think that's where I'll be next year. . .:) You know, working with different craft projects, sort of mix bag of various areas of crafting. . .we'll see.

Anyway. . .just sharing my thoughts. Below is the tutorial. You don't need a Facebook account to subscribe to Scribd but you do need to subscribe by providing your email address and a password in order to download or print the tutorial. If you don't want to subscribe, you can view the tutorial directly online on my blog or on Scribd. You have the option to view the tutorial full screen, scroll option, or book option. Email me if you have any questions.

Hope you all have a beautiful Wednesday!!

Gate Fold Double Accordion Mini Album


Friday, June 4, 2010

Christmas Stampin All Year Long Gift Set Challenge #4


Hello Friends!! It's Friday and boy am I HAPPY! I've been feeling tired lately. Sort of worn out so it'll be nice to relax during the weekend! Well, another reason I'm happy is that today is Christmas Stampin All Year Long challenge time and because it is the first week of the month, it's a gift set challenge! The challenge is to create this cute "CD Envelope 5.5 x 5.5" Purse Mini Album"! It's funny that I say that it's cute because it's a tutorial I created! LOL! You will probably recognize the project. . .I've created it a few times since creating the tutorial!

Anyway. . .stop by Christmas Stampin All Year Long and check out all the super cute mini albums the design team created as well as the tutorial for this project!! Hope you'll play along this week!

It's a fun purse mini album to give to family during Christmas or any occasion. I decided to use my SU Designer Paper and Stamp set. I love the colors!

I left the inside blank because I'm going to give this gift set to one of my family members during Christmas and I wanted to wait before adding a photo. I don't have any recent photo that I would like to add to the mini album insert. I forgot to take a photo of the inserts pulled out of the album. If you want to see how it looks when the inserts are pulled out, check out another mini album I created last year. It shows a more complete photo of the mini album as well as the tutorial.

Click Here

Here is the matching card! It was a super fast card to make. All I did was adhere the designer paper, add the trimming, the ribbon and the stamped sentiment. It was a quick 15 minute card.

Anyway. . .that's it for today. I hope you all have a beautiful Friday! Be sure to play along with us at Christmas Stampin All Year Long!!

Wednesday, May 12, 2010

My Scrap Chick Dad Word Album and Bear Camp Out

Hello Friends!! Hey. . ..I created a project way in advance of the actual event!! I'm so proud of myself. I'm usually behind and do everything at the last minute. I decided that I'll start working on projects a month in advance. This is a "Dad" word album that I created for my husband for Father's Day.

I used the myscrapchick.com "Dad Word Album" and "Bear Camp Out" files to create this project. Stop by myscrapchick.com and check out all the cute files they carry. . . maybe you can start on your Father's Day projects early too!

I didn't have any camping photos so I just used random photos. Do you see the bear roasting marshmallows and the bear with the hot dog in my first photo? Well, it's a cutting file from the "Bear Camp Out" file by myscrapchick.com. I think my next project is to create a card with that file set. Isn't it perfect for Father's Day?


Again, here is the bear from the "Bear Camp Out File". If you're wondering how I created the shading on the bear? Well, I cut the bear in a lighter color and using my sponge dauber, I rubbed ink on to the image to give the image a bit of definition rather than a flat look.


This is a photo of my daughter and my husband. My daughter and my husband are best buds. . .they are video game buddies! LOL! My daughter hangs out with him more than she does with me because my daughter don't like to craft!! This photo was taken on my husband's birthday.

Last but not least, this is a photo of my husband and his son (my step-son). this photo was taken when we visited Muir Woods in Northern California.

Anyway. . be sure to stop by myscrapchick.com and check out all the fabulous files they carry!!!

Hope you all have a wonderful Wednesday!!


Thursday, May 6, 2010

My Scrap Chick Shaped Cards and Tab Album

Hello Friends! Wow, I've got a lot of stuff to share today!! How are you all doing with your Mother's Day projects? I wish I was able to create more Mother's Day stuff but call it poor planning which isn't surprising for me. . LOL! I am the "fly by the seat of your pants" sort of person. I leave all the planning to my husband. . .he's a super planner. I'm not exaggerating. Fortunately, he has me to make his life less predictable!

Okay. . .this is a long post so let me get started. Before I begin. All shapes and cuts on my projects were created using myscrapchick.com cutting files. Just letting you know so I don't keep repeating myself.

I decided to create a mini album using the "$1 Tab Album" file for this album. I cut chipboards on my Cricut Expression then cut designer papers to cover the chipboard. I decided to use my "Bind it All" to bind my album. All designer papers used on this album are K&CO. I love their papers. . .the designs are so pretty. The created the pretty label at the front of my album using the $1 Floral Frames file. Isn't it pretty?


I used the "$1 Spring Flower" file to create the pretty layered flowers on my first page. Just a quick story about my album. I created this Mother's Day album for my daughter for Mother's Day. Isn't she supposed to create something for me? Yeah. . .but she's not the crafty sort.

My grandmother adopted me when I was a little girl and I considered her my mother but she passed away several years ago so I don't have a mother to give my Mother's Day album to. Therefore, the next best thing is to give it to my daughter.

The first photo was taken on a whale watching cruise several years ago. I look strange in the photo but I like how my daughter is hugging me so that's the reason I chose that picture. The second photo is a photo of us at my cousin's wedding. It's the only photo I have where we're both dressed up. I'm usually the one taking photos of others so I don't have many photos of me.


The next project are these bee hive cards. This is actually a sneak peek of the Shaped Cards that will be released tomorrow at myscrapchick.com. More shaped cards! Click Here to check them out!! Oooh, how fun! Last week another set was released: Click Here. Be sure to stop by myscrapchick.com tomorrow to check out the new shape cards being released.

I decided to create a fancy bee hive card so with this first card, I used a pretty designer paper. Although it looks like I did a lot of things with this card, all I did was cut the file on to designer paper, drew in the stitches and added the ribbon and sentiment tag. That's basically it but doesn't it look like I worked harder to create this card? LOL! Gotta love that, huh?

With this card, I decided to cut the file on regular card stock to give it a more traditional bee hive look. Again, I drew in the stitches, added a bit of Stickles glitter to the the bee's wings and added the ribbon and sentiment tag.

This second set of cards are also going to be part of the new Shape Cards file set that will be released tomorrow at myscrapchick.com. I decided to create a boy and girl version. The cute animal cuts are from the "Sweet Animal Books" file set. They are actually meant to be used to create mini animal albums but with the myscrapchick.com files, you can basically use the files for any type of projects. They are very versatile!! You just need to use your imagination!

I decided to use "cupcake" designer papers by DCWV for my "baby onsies" shaped cards. This is the girl version of the baby onsies. Creating these shaped cards are so fun! I get a kick creating them because it just brings my card making projects to a different level.

This is the boy version of the baby onsie card. It's the same design as the girl card but using different colors and different animal.

Anyway. . .let me close the post by letting you know that the second set of cute shape cards files will be released tomorrow but if you can't wait to create a few shaped cards, you can play around with the first "Shape Cards" released last week!

Okay that's it!! Hope you all have a beautiful Thursday!!

Thursday, April 22, 2010

Pink Cat Studio Digi Release and Purse Mini Album SCUT, SVG and Hand Cut Template


Hello Friends! It's Thursday and it's the release of Pink Cat Studio digital images!! Fun, fun, fun! This week focuses on purses! Our girls are ready to shop! LOL! Aren't they super cute or what? These images are perfect for creating purse projects and cards for your girlfriends! Be sure to stop by the Pink Cat Studio blog and check out the awesome cards and projects created by the design team!!

I decided to work on a purse template and with this first project rather than creating a card, I decided to create a mini album. My album has 4 pages. Scroll down for the SCUT and SVG files and hand cut template.


Project Details:

Stamps: PCS digi image
Paper: DCWV Designer paper, CTMH card stock
Ink: Copic Markers
Accessories: Lace, Making Memories Ric Rac, Nestabilities, Darice Rhinestone, organdy ribbon, Cricut, SCAL2


Quickie Instruction on the Mini Purse Album

***I'll post the picture tutorial some time today. I didn't have the time to finish it.

  • If you're using the SVG file, when uploading to your SCAL program, scale the image to a height of 11.25" and keep the proportion. . .the width should adjust accordingly. The SCUT is already scaled and ready to cut.
  • Follow the hand cut template for the score line.
  • To create the pages, reduce the height to "10.75" and cut the file 4 times
  • Score the pages. . .again following the hand cut template score lines
  • Adhere the two large panels of each cut together. Repeat the step for 2 more cuts
  • Stack each page on top of one another and adhere all the pages together by adhering the small flaps together. Adhere Only the small flaps.
  • Punch two holes at the top and thread a ribbon to each hole and tape the ends of the ribbon to the inside of the back panel.
  • Fold the small flap over and adhere to the back panel of the purse album
  • With the last cut, cut off one large panel and adhere to the inside of the back panel.


Click on the image to download SCUT file
or
Click here to download the SVG File


Hand cut Template

For those using the hand cut the template, using your photo editor program, increase the file to the desired height before printing. I recommend extending the file as large as you are able to print on an 8.5 x 11" paper.


With this second project, I created the purse using the Cricut "Wild Card" cartridge. I REALLY love this cartridge. There's so many possibilities in creating lots of different card projects. I can't wait to work on more projects using this cartridge.

I colored the image using my Copic Markers for both projects.


Card/Project Details:

Stamps: PCS digi image
Paper: K&Co Designer paper, CTMH card stock, SU Creamy Caramel
Ink: Copic markers, Pebbles Inc. pastels
Accessories: Nestabilities, trimmings, Grosgrain stitch ribbon, prima flowers, Accents daisy brad


Photo of the Day


Hey. . .I wanted to share a photo of my cat. Yesterday as I was heading downstairs I spotted my cat Dori hanging out at the corner of the hallway! She found a spot where the sun shines through the window. . .I guess she was cold. When I saw her laying there in that funny position I just had to run and get my camera and take a picture of her.

Hmmm. . .she sort of reminded me of myself right now. My cat is a bit overweight and I think she likes to lay this way because of her fat tummy. It reminded me that I need to get back and start working out again. I've been slacking for the past month. Just wanted to share. . .I thought it was such a cute pose.

Wednesday, March 31, 2010

My Scrap Chick "Mom" Word Album and Cut Flowers

Hello Friends! Let me tell ya'. . .I literally turned over my craft room to create this project! LOL! You're wondering "why". . .it's not like there's anything really complicated about it. Well, let me explain. . .I wanted to use my "Bind it All" and I could not find it. I cleaned my craft room a few months ago and I did not know where I stored it! Uggggh!! Anyway, the good thing is I found it, the bad thing is my room is now in a serious state of chaos!

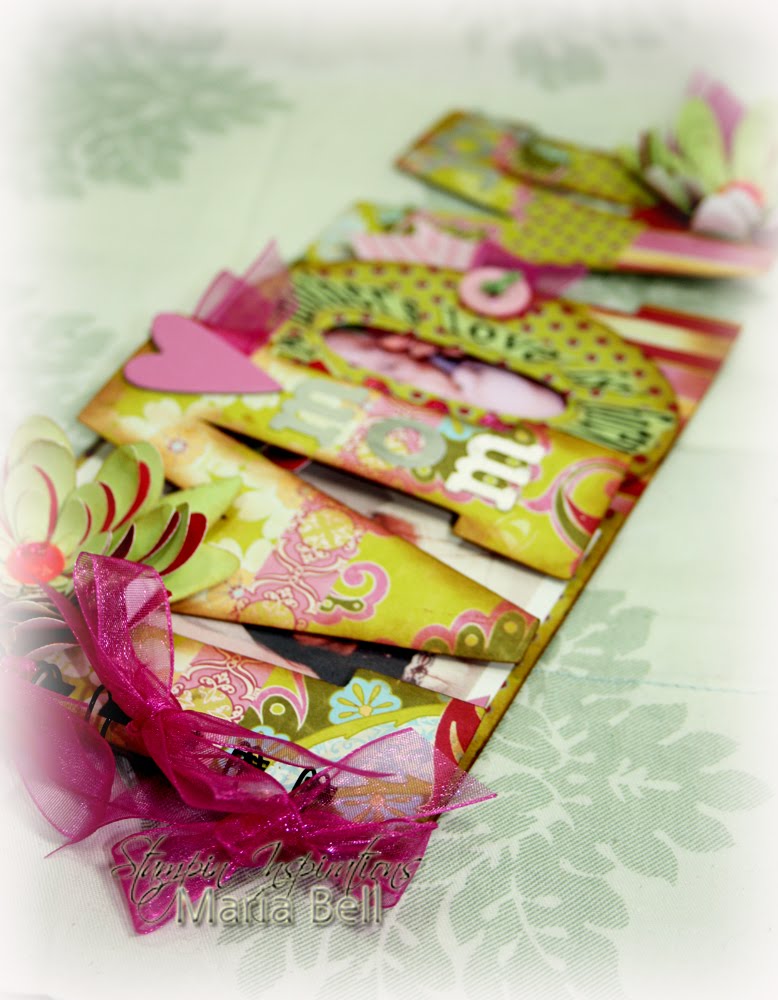
Okay. . .let me talk about my project!! I created this word album using the $1 Mom Word Album cutting file from myscrapchick.com and using my Cricut Expression to cut the album. Do you see the layered flowers? I used the "Cut Flowers" file, again from mycraftchick.com! OMG! I am so in love with the files at myscrapchick.com and my Cricut. No more punching, no more hand cutting! Do you know much time I saved by having my Cricut cut all the shapes for me? This album would have taken me a few days if it weren't for the files and my Cricut but it only took me a day to finish up the album! I'm so happy about that!

Because there's a lot of photos. . .I'll write short captions for each photo. This is the front of the album. I used my K&CO designer paper and Making Memories metal and chipboard embellishments.


The flower next to the photo is another flower file from the $1 Cut Flowers file from mycraftchick.com

This photo of me and my husband and my grandmother and daughter. My grandmother (who adopted me when I was little) passed away a few years ago. I miss her immensely. I could tell you stories about her. . .she was such a strong woman. . .she endured a lot of hardship. . .I'll talk about her another time.

This is a photo of me, my daughter and my grandmother. I created the sentiment by using a scrapbooking program and used the "word art" feature to create the rounded effect.

Another close up of me and my husband's photo.

A close up of my grandmother and daughter's photo. I created the heart shape and sentiment using my Photo Shop program.


These two photos highlight the layered flower using the "Cut Flowers" file. All I did was adjust the size of each flower cut by 1/2" each and layered the flowers after cutting them.

Anyway, be sure to stop by myscrapchick.com and check out all the fabulous $1 files. You'll love them as well as all the other files!

Hope you all have a wonderful day!! I'm off to clean my craft room! Wish me luck! LOL!

Project Details:

Cutting Files: myscrapchick.com $1 Cut Flowers and Mom Word Album
Papers: K&Co designer paper, SU Pretty in Pink, Certainly Celery
Ink: Tim Holtz distressing Ink
Accessories: SCAL2 program, Cricut Expression, Darice rhinestones, Dew Drops, Making Memories Metal alpha, Making Memories chipboard, Bind it All, Organdy Ribbon, Making Memories Ribbon, Fiskar Scallop Scissors, alpha stickers, buttons, embroidery floss

Related Posts Plugin for WordPress, Blogger...
 
Share |