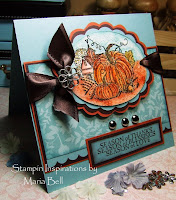
I was going to write my own instructions for this card but it's a bit long so I decided to link the instructions from SCS instead.
Click Here for the Tutorial.
There's a slight variation to my card from the instructions given on SCS. I did have a few difficulties when creating this card. I had initially created the dimensions exactly as the SCS instructions but made a few technical errors that I ended up having to modify the card a little bit.
- I had punched the slider window too long (the instructions asked for 1 and 1/2
length of the word window punch) and I think I went over that by a half inch so
when the inner insert was reinserted behind the face, it would show up at the
bottom of the face of the card. - To fix that problem I cut the inner insert by 1 inch.
- The second problem was the top portion of the sliders were punched too low, so
when I pulled on the outer insert to pull up the hidden messages, the hidden messages of both the inner and outer inserts' were cut off half way from viewing. - To fix the problem, I punched the window for the sliders higher up on the card.
- The third problem. . .the brads would get caught on to the card when I reinsert
the card. I can't fix this problem unless I remove the brads which I don't want
to do. I just need to reinsert the inserts carefully.
Materials
The stamp set used for this card was Mixed Bouquet and the sentiments were from Friend to Friend.
The ink colors are ballet blue, green galore, garden green and pink passion pixie pink.
The cardstock used were white, beige, pink, pretty in pink, and ballet blue dye inks.
Slot punch for the top to insert the pull ribbon.


The card below is actually the first slider card I made. I had a few technical glitches similar to the ones I did with the card above. I had placed the heart on the outer insert too low so when the insert was pulled up, half of the heart did not show so I had to move the heart up a little bit.
You can't tell by the picture but the images on the outer insert (the one with heart in the back), are mounted with foam to give it a 3D appearance. It looks great but when I tried to reinsert the insert back down, the sides of the base card would pop off because the foam tape made the card bulky. The adhesive just could not hold the sides closed whenever I reinserted the inserts.
To fix that problem, I stapled all around the edge so it won't pop off. The staples are not a design concept, it's to fix a mistake but it turned out okay because it looks like an embellishment instead.
Materials
The stamp sets used were from A Light Heart and the outer insert was stamped with Loving Hearts.
The ink colors were pixie pink and real red.
The face design was stamped using white craft ink on to real red cardstock then heat embossed.
The cardstock colors used were pixie pink, real red, and white.
Punched tab from the Word Window punch for the pull handle at the top of the outer insert.

I don't want you to be discouraged in making this card. It's an excellent concept. I do suggest that the inserts should be designed in a simple way and leave the heavy embellishments to the front of the card.
Secondly, don't let the technical problems deter you from making a beautiful card. There's always a solution to a problem.
Until later. . .


