Card Tote and Cards Template and Tutorial
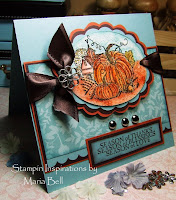
 Hi Friends! I finally got a few gift set projects done! These card tote projects fit three to five cards depending on the size you decid to cut the templates (posted below). You can resize them to create different size totes. Two of the boxes measure 4 x 5" and the smaller box measures 3.5 x 3.25" but I created 3 x 3" cards for all 3 boxes.
These are my "purpose driven projects". What is that you ask? Well, have you ever wanted to create projects with a purpose in mind, whether it's to sell them and make money, to give them to friends and family, or to donate them to a worthy cause? Well, a few weeks ago, I had called my church and asked them if they were willing to accept my crafty project as donations. They didn't call back for a while because they probably weren't sure what to do with them. LOL! They finally called back last week letting me know that they could find use for them and will gladly accept them. I suggested maybe giving them as a "just because" gift to someone during bible study or to someone who needs a lift and to the kids that attend the services. It really doesn't matter what they are going to do with them . . .I was just happy that they are willing to accept my donation.
The lovely part of it all is that it's an on-going donation. . .so when I make enough of them, I have permission to drop them of at any time! Yipee! It feels wonderful to be creating with a purpose. For sometime now, I've been losing interest in my crafting because other than giving my projects to friends and family or to my crafting friends, well. . .I wanted to do something more with them. Now that I know my craft projects will go to a good cause, I am so excited to be crafting and creating all kinds of projects; therefore, it's not purely altruistic. I benefit from it too. . .:) I have good news. . .I figured out how to create outline templates for those who don't have a SCAL2 program for the their Cricut. For the longest time, I could not figure out how to create the score lines on a template. Today, I had a blessing by God. . .I learned how to do it and it was so amazingly easy! I knew it had to be a blessing. I think God knew I wanted to share my templates so I think God made it easy for me to learn it.
I think blessings come in many forms. . .but you have to recognize them as such. Sometimes we go through life not realizing that God blesses us with many loving gestures. We sometimes say we're lucky. . .but when you see it in a different light, you'll come to realize that they are God's blessings and you'll see how blessed you are. Here are the 3x3" cards I created for my card totes. It's very simple designs because I want to be able to make a lot of them so I'm trying to not make them so elaborate. I'd like to drop off a bunch of gift sets and projects to my church at the end of the week so I really need to hustle! LOL!
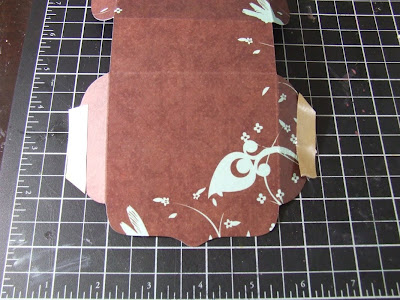
 Anyway. . .basically, I cut the box using the template below. I uploaded the template on to my Sure Cuts A Lot 2 program and cut the tote shape with my Cricut Expression. You're probably wondering why I don't create SVG files and instead create jpeg files. .. well, Blogger won't allow me to upload SVG files. I did try to create it as a SVG file and uploaded it to a site that allows SVG file uploads but when I tested it out, it didn't download as an SVG file so I wasn't able to upload the file to my SCAL2 program. I need to play around with it a bit. I'll let you know when I figure it out. In the meantime, you will need to convert the jpeg file into an SVG file yourself if you don't have the SCAL2 program.
To create a 3.25 x 3.5" tote, you will need to adjust the "width" to 5.5" and be sure to "keep the proportion". Save the file to your computer by clicking on the photo and right click your mouse and "save image". When uploading on to your SCAL2 program, click on the "auto trace" feature.
 Sure Cuts A Lot 2 Template
 Hand Cut Template
 To create the handle, cut a strip of card stock or designer paper with the length being 12". The width will be dependent on the size of your box. When cutting the handle, cut it about 1/4" less than the depth of the box. (Measure the side of the box to determine the depth). Attach the handle on the inside of the box using double stick tape or glue.
Create cards (size depends on the size of your box).
That's it! Very simple!!
Hope you all are having a wonderful weekend!!
Card/Project Details:
Papers: DCWV designer paper, SU Cool Caribbean
Accessories: Brads, Cricut Expression, Prima Flowers, Word Window Punch, Scribbles Iridescent Paint


9 comments:
Such lovely sets! I will have to try this sometime.
What a great post, Maria. I volunteer at my church in the childrens' ministry and give away as presents to my team leaders, totes filled with cards. It feels so good to give them away...as you say...to others besides family. I think I'll also give them to the ladies in the church office. Thanks for reminiding that there is no such thing as luck, but talelnts as given us by our Lord. I will try your tote template. I'm a little confused by the resizing, but I will try to work it out. Have a blessed week.
Hi Maria...thank you for sharing your beautiful creations with us!
Donna
Maria Cool, thanks nice of you to donate projects for church
Darling project, Maria!! Love the yummy color combo!!
Love these! Thanks for the tutorial!
Fantastic project Maria. Thanks for sharing. I've just posted one I made over on my blog My Creative Place. I think I will be making a few more down the track.
These are beautiful Maria! Great job and so creative. Hugs, Peggy
Wow- thanks! Have you heard of Operation Write Home? They are @ their name and then (dot) org and send handmade cards to our deployed military heroes. Such a worthy cause, I hope you'll check them out! Cheers and TFS!!
Post a Comment