Friday, November 30, 2007

BLOG CANDY TIME!! Count down to my blog 1st Birthday on December 5th!!

Countdown to my blog 1 year birthday!!


Hi everyone! Well, it's time for a blog candy! I'm doing a countdown towards my blog 1 year birthday which will be on December 5th. I'm also celebrating several blog milestones . . ..I've reached my 100,000 hits for Stampin Inspirations and 80,000 for Card Inspired and 1,000+ subscribers for both blog sites!! Whoohoo!!!

I would never have imagined that I would reach any of those milestones. Blogging has been such a fun part of my life. I've met many wonderful blog friends and sharing ideas with other people who have the same interest as I do.

Thank you to those who visit my site and comment. . .I really appreciate your comments because your input is very important to me. As a thank you. . .I will automatically add your name to the blog candy bucket for each comment you've made starting October 1st to November 29th.

There will be many opportunities to play. . .each time you play along, your name will be added to the blog candy bucket!

Want to play? Here are the rules:

First of all . . .comment this post and your name will automatically be added to a blog candy bucket in which I will be pulling a name out of to choose the winner!! Please comment on the post. DO NOT SEND ME AN EMAIL. My email is sort of messy right now and I may miss your comment so COMMENT ON THE POST ONLY.

#2 Starting tomorrow, I will be posting a "challenge" as a count down to my blog birthday so basically you have 6 opportunities to add your name. . .I'll keep the challenge simple such as ansking a question, asking for an opinion, sending a picture of your favorite card, etc.

#3 I will be posting this blog candy for both blog sites (Card Inspired and Stampin Inspirations) so you have two opportunities each day to submit your name.

I will be adding a prize each day starting tomorrow until the day the blog candy ends on DECEMBER 5th! All of the prizes will go to ONE lucky winner. I will announce the name of the winner on December 6th!! I'll post the first prize that will go into the prize bucket tomorrow!

I will be posting this same blog candy on Card Inspired for those who visit my Card Inspired blog site . Remember. . .you can play both blog sites. The challenges for both blog sites will be different so be sure to drop by both blog sites for more opportunities to submit your name!!

Come on and play along! You will LOVE the prize!

Again, thank you everyone for being such wonderful blog friends!!

Thursday, November 29, 2007

Video Tutorial 3 - Metallic Frame Using a Leaf Pen or Metallic Markers


Click on the "play" button to start the tutorial


Hi everyone! This is the finished cards of the tutorial. You can't really see it in the picture but in person, the edge of the cardstock is framed with a gold lining using a Gold Leaf Pen. It matches the gold embossed image.

The color combo is SU Bravo Burgundy and Cranberry Crisp, golden rod by Serendipity and the base card is actually a stripe embossed cardstock by DCWV. The stamp is by Penny Black.

I placed the lamp too close to the card so when I took the picture it washed out the dry embossing of the card base.

Sorry about the terrible picture of the gold embossed image but like I've said in the past, I can't capture shiny metallic images with my camera. I need to figure out how to keep it from being so reflective.


I created a whole bunch of these cards in different colors. I took picture of only two of them because the only difference is the color combo.


This one is a Cool Caribbean and Wild Wasabi combo. I used SU Glitzy Blue embossing powder and Silver Leaf Pen to frame the image. I wish you could see the silver lining but I can't take a good picture of anything metallic.


Sisterhood of the Blogging Stampers 2


Hey Everyone! I typically don't join groups because I don't have the time to play along with whatever is going on but I decided that it would be fun to join this sisterhood. I'm in Group 2. Group 3 is just being opened up so if you're interested in joining the sisterhood. . .click here.

The requirement for this sisterhood is I have to first of all introduce myself, display the sisterhood banner, link my sisters on to my blog, and visit my blog sisters' sites regularly and give them words of encouragement or whatever by leaving a comment on the site.

Okay. . .let me begin by introducing myself. . .I'm a mother of 2 teenagers, professionally I'm an RN but haven't worked in the field for 2 years since moving to California from Hawaii. Next year on Mother's day makes 4 years of being a rubber stamper. I'm a scrapbooking newbie and would like to start getting more involved with it. I've been a Stampin Up Demonstator for 1 year now but prior to moving to California, I was a Stampin Up Demonstrator but went inactive because of our move. I enjoy blogging and I started blogging primarily for the purpose of recording or journalizing my work but it progessed to a form of communication with other people who have similar interest as I do.


That's it!

House Christmas Decoration

Hi everyone. Well, we decorated the house this week but believe it or not, we're not done yet. I started off with a bang but I'm slowly fizzling out.

I bought the pretty garland and huge wreath from Costco. The garland comes already lighted. At first I was thinking of creating it myself but when I added up the cost. . .it would've cost 2 to 3x more than the premade one and quite honestly, I wouldn't have been able to make it as pretty as the premade one at a reasonable cost.

I'm sorry for the poor quality pictures, but I took the pictures at night in very low lighting.

This is a close up of the garland. It has big flower pieces, ribbons and ornaments attached. In person, the garland is really pretty. I love it. The wreath is a matching piece of the garland. The wreath came seperate.

Do you see Santa? Isn't he cute! I love it because he is animated. We also have a Santa and Mrs. Santa set that also moves.


This is a Santa Village on the entertainment cabinet in the living room. My husband put up the village when I was away from home and he didn't put the fluffy snow that I asked him to use. I now have to figure out how to put the fluffy snow without having to redo the whole village. Anyway, it looks cute when its lit up.


This is the Christmas village with a train set. We have another train set that is more authentic looking but it's too large for the table. My husband bought this rinky - dinky train set. . .shhhhh, don't tell him I said that. . .but honestly, I really don't like the set. I wanted him to put up the other train set but he refused to put it up because in previous years, it had to be placed on the floor and it took up too much space. I do love the Christmas Village so I'm happy with the overall design.


I wish we had a full mantel for the fireplace. When we bought the house, it didn't come with a full mantel. Anyway. . .this is the fireplace decorated. Do you see Santa and the elves climbing up the fireplace.? Aren't they cute?


The bears are back. Every year since 1998, we've been collecting these Christmas bears that are sold at Walmart. Did you know that on Ebay, some of the previous years are collector pieces selling at times, 3x or more of the original cost?
Anyway. . .the bears are sitting on the floor in the family room. Sorry for the fuzzy picture. I took the picture in low lighting at night.


This is an old floral center piece located on a room divider between the sitting room and the hallway.

We've had these decorative pieces for over 5 years. They're still pretty.


I think I'm going to move the manger set somewhere else in the house. A floral center piece will be a better piece for this area. The Santa Village is in the background.


Wednesday, November 28, 2007

House Mouse Christms Card from Yesterday Tutorial


Hi Everyone! Here is the card from the image that I colored on my tutorial yesterday. I'm sorry about the music being too loud on my tutorial. If the music is too loud, there is a volume control on the tutorial so you can turn it down. The music I listen to tend to be upbeat and LOUD! LOL!!

I changed computer and right now, I have a limited amount of MP3s on my computer. I'll transfer a few classical music on to my computer so I can put softer music. I need to be mindful that many of my readers may prefer softer music. I'll be sure to keep that in mind on my next tutorial!

Just to let you know, if your Internet runs slow or if you have other programs running in the background, it may slow down the download of the tutorial and may run choppy.

Jana asked if the technique for the first tutorial on coloring with pastels require a spray fixative because of the pastel. . .the answer is no. The pastel stains the glossy cardstock and when you watercolor over with the markers, it further stains or seals the pastel.

Thank you all for your suggestions. I appreciate the feedback!

Tuesday, November 27, 2007

Video Tutorial #2 - Watercoloring with SU Markers on Watercolor Paper

Click on the "play" button to start the video tutorial

Sorry. . .I just had to make another video. I am having way too much fun with it! I did attempt to try making video tutorials in the past but I didn't like how I sound on video. I have a very young person voice. . my kid's friends' mistake me for my daughter when I answer the phone. It doesn't sound very commanding or professional so. . . now that I found a way that it wasn't necessary to talk. . . .well. . .it's the beginning of new things to come!! Whoohoo!

Anyway, I did a video tutorial on a simple coloring technique. I know many of you are new with stamping and coloring is one of those things that may be a little difficult for you. For those of us who have been stamping for a while now, we sort of take it for granted that coloring an image is a simple process. It is . . .really. With a little practice, coloring an image will be a snap!!

Check out my video tutorial for a very simple way to watercolor with your SU markers or any water-based markers. Don't use alcohol based markers such as Prismacolor or Copic markers. It won't work with these markers. You may use Zig, Le Plume, SU, etc.

Let me know if the lighting is bad. . .it looks okay on my end but when I checked my previous video tutorial on my laptop, the color was too faded and I couldn't really see the colors as they were intended to look. On my desk computer, the color showed up really well. I guess it depends on the brightness of your computer screen.

I would like to improve my tutorial so feel free to let me know what you REALLY think about it, okay! Don't worry. . .I won't be offended.

Video Tutorial - Coloring with Pastel and SU Marker with Aquapainter/Water on Glossy Cardstock

Here's a video tutorial I created on coloring with pastels, SU markers with an aquapainter/water. Whoohoo! It's my first video. I added music and titles rather than talking. I decided to create a video tutorial because it's much easier to show the process of coloring the image versus doing a written tutorial. Just to let you know, the video was edited to shorten the time. The actual coloring time was about 3 minutes. I'll do another video tutorial on coloring with Prismacolor pencils with Gamsol. Stay tuned!

When coloring with pastels on glossy cardstock, the color will be very light. Use a q-tip to rub the color on to the cardstock. The SU marker with the aquapainter/water is used to shade the image. The pastel and the SU marker give the image various shades of similar colors so your colored image don't look flat.

It's important that you don't use an overly glossy cardstock. It'll still work but you may need to rub the pastel in more vigorously than with a low glossy cardstock. Try it out!

Monday, November 26, 2007

Just a Whole Bunch of House Mouse Christmas Cards

Hi Everyone! Do you compulsively buy rubber stamps? I used to be a compulsive buyer. I'm better now and don't buy stamps as often as I used to. I've been creating 2 cards for each stamp to satisfy my use requirement.

I bought a whole bunch of Christmas House Mouse stamps last year and I believe I used each one only once or not at all. I feel really guilty that I buy stamps and don't use them. Instead I would continue to buy new images. I've decided to stop this bad habit. One way for me to not feel guilty is to use the stamps more than once.


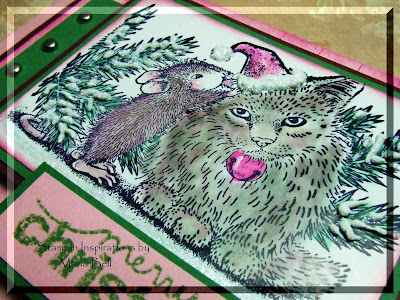
The special feature of this card is the puffy part of the cat's hat. I used the "Decoart Snow Writer" to create the puffed feature. It's similar to the look of using Liquid Applique but it's a little "whiter/brighter" and it puffs naturally. With LA, you need to heat it to puff up.

I colored the image using Pastel and watercolored with SU markers/Aqua Painter on glossy cardstock.

I used SU Pretty in Pink, Garden Green, and Bravo Burgundy cardstock for the color combo.


This is a 5.5 x 5.5 card. I used the CB "Snowflake" embossing powder for the background and rounded the corners. Once again I colored the image with Pastels then going over parts of it with SU markers and an aqua painter. I stamped the image on glossy white cardstock. Why glossy? Well because it's much easier when using pastels and wartercoloring with water based markers. It's not a very detailed way of coloring but it's much faster.

I used SU Garden Green, Bravo Burgundy, Certainly Celery and Pretty in Pink cardstock for this card.


This was a fun image to color. House Mouse designs are so nicely drawn. . .the details are impeccable.

I use Provocraft Holiday Collection papers. The papers in this stack are very pretty. I really like this color combo. I used SU Night of Navy and Cool Caribbean cardstock.


I used Stickles glitter to create a bit of sparkle on the cookies. I love using Stickles glitter on my projects.


Sunday, November 25, 2007

House Mouse Christmas


Hi Everyone! I made two cards with the same design but with one card, I covered the tree with "Decoart Snow Writer" and covered it with glitter. I bought the snow writer at Michaels. They're located in the fabric dimensional paint section. It has a puffy snowy look to it. It dries fairly quickly.


The stamp is by Stampabilities - House Mouse series. I colored the image using pastels on glossy card stock and shaded a few areas using SU markers and an aquapainter.


This is different but the same. With this card, I used regular clear glitter to cover the tree. Everything else about the card is the same.

I think I prefer the puffy snow on the first card. What do you think?

I heat embossed the snowflake background and the sentiment with white embossing powder so that they tie in with the snow on the tree.

I'm going to be busy in the next few days and may not be posting for a few days. If I have time, I'll post any new cards or projects that I create.


I created a few tutorials on my Card Inspired blog site. Stop by and check them out if you haven't done so yet.


Saturday, November 24, 2007

Just a Bunch of Christmas Pocket Cards with Inserts!!


Hi Everyone! I made these pocket cards on Wednesday but did not have the time to post them. I'm getting tired of my regular cards and wanted to do something different.

The image on the card to the left was stamped using Stampabilitie's "House Mouse" design stamps. Aren't those mice cute? I have a few Christmas House Mouse stamps that I'll be using in the next few days.


This is the card with the insert pulled out. The half circle slot on the pocket allows the sentiment to show when the insert is put back in the pocket. To create the slot, I used a 1 inch circle punch.

Guess what medium I used to color these mice? Well. . .the answer is "pastels" mixed with watercoloring using markers on glossy white cardstock. Coloring with pastels is much faster than coloring with markers or pencils and the results are pretty nice.
I added glitter to the snow - you can see a little bit of it in the picture.


Just another set of pocket cards.


I colored the snowflake using SU Glittery Blue embossing powder. SU no longer sell the glittery embossing powders. As you can see in the picture, the snowflake and sentiment are really glittery.
The images were stamped using a Close to my Heart stamp set.


These are the last set of pocket cards I made. The Christmas tree background is a cut piece of designer paper by DCWV. The flower image was stamped using SU "Polka Dots & Petals" stamp set and the sentiment is by Studio G.


Friday, November 23, 2007

True Friend Card

Hi Everyone! I hope y'all had a wonderful Thanksgiving. We had a very nice day. I didn't over stuff myself. . .:) Thanksgiving is a great kick off to the Christmas holidays. I really wish I started earlier with the Christmas stuff but oh, well. . . I'll be sure to start off earlier next year.

I'm planning to change my blog site banner sometime soon. The first change I decided was to go neutral with the blog background as well as my pictures. I like the simplicity of the plain background. What do you think? Do you think I should go with the neutral or the colored background.

On to the card. . .I rubber stamped the flower twice with Versamark using the Stampin Up "True Friend" set, heat embossed it with SU Glittery Blue embossing powder, cut the flowers out and mounted the flowers using foam tape.

I also shaded the edge of the designer paper by K&Co (you can't really see it in the picture).

You can't really tell in the picture but the embossing powder is very glittery. As you can see, the image is 3D because of the foam mounting.

I topped the flowers with JoAnn brads. The color combo is SU Bashful Blue, More Mustard, and Old Olive.

Now back to crafting. . .see yah all later!


Tuesday, November 20, 2007

Non-Christmas Cards This Time


Good Morning Folks! I created these cards last night watching a DVD last night. When I craft, I always take the opportunity to watch television. It's the only time I have the time to do so. Watching TV while crafting also keeps me from getting bored. I get bored easily especially when I'm sitting down. The papers I used to create this card is by K&Co. The flower images are by Stampin Up and the sentiment is by Studio G. The card is basically a whole lot of cutting and layering! It was fun making this card.

Yesterday was a busy day again. We went shopping at Costco and bought a few Christmas decorations. I'm going back today after I blog because there are a few more items I want to get. They have really pretty Christmas decorations.

We did a little bit of Christmas decorating yesterday afternoon. We're doing little by little each day. Last year we did everything in one day and I was too tired afterwards to appreciate all the decorations.


I love striped paper. I use striped designer paper all the time. I love it because it doesn't take away from the image. Sometimes when the paper is too pretty, it can distract from the message or the primary image. I find that stripe paper doesn't distract but compliments a design or primary image.

The papers are from K&Co and images are by SU.


Monday, November 19, 2007

Elegant Embossed Card

Good morning everyone! I was playing around with this stamp image this morning. I decided I could not color the image. . .the image is like a sketch drawing so I decided that it was best to just emboss the image. I really have a difficult time with simple cards. I'm so accustomed to busy colorful cards that it's really difficult to come up with a simple design.

With this card, I stamped the image on to a beige colored cardstock and heat embossed it with copper embossing powder. I used a swirl stamp by Autumn Leaves to create the background and heat embossed the swirls with the same copper embossing powder. This card is a 5x7 card. The primary image is a stamp by "Impression Obsession".

I like this card the best of the three cards.


The card looks better in person. The camera could not capture the metallic aspect of the image properly.


This is a 5x7" card. A little bigger than the typical handmade card. The image is large so it can't fit on a standard card size. In person the card is very 3D. The image is matted and layered with foam tape.


I used gold embossing powder for this card and the cardstock is burgundy and goldenrod by Serendipity.


It's hard to take a picture of cards with shiny stuff! I have to keep the light a distance away because the light reflects on the metallic aspect of the card and becomes too shiny. Unfortunately, the result sometimes make the card too dark.


I used copper embossing powder for this card and lined the edge with a copper leaf pen. This is a 5.5 x 5.5 square card.

I like this card the least of the three.

Until later, folks!!

Cutesy Christmas Cards


Just a bunch of cards I made last night. I was playing around with different colors. Gosh, I was so tired yesterday. . .I typically stay up late but last night, I laid down at 9:30 just to rest and next thing I knew it, it was morning.


I don't know about this card. Maybe if I used a different color other than the brown, this card would have come out better. The snowman is a cutie though. I'll try it again using a different color combo.
Until later folks. . .


Sunday, November 18, 2007

Glittery Christmas Ornaments

UPDATE!!

I left my tutorial uploading overnight and when I checked my computer this morning, the tutorial finally was completely uploaded. Yay! I was so DISTURBED yesterday when the tutorial did not finish uploading. I basically stared at the progress bar willing it to move faster. I couldn't do anything else but sit and watch it. Whenever I would walk away thinking it would be done when I returned, instead, I would be greeted with a message saying "click retry" meaning my Internet server flaked out while I was away. I REALLY hate my Internet server. . .Time Warner is getting on my nerves. Remind me not to upload tutorials on the weekend.

Anyway. . .try the tutorial out. . .the ornament is actually easy to make if you have the patience to make it!!

__________________________________________________________________

Hi Everyone! I've been working on these ornaments for the past few days. I love them because they're very shiny and they sparkle under the light. I created several different designs. . .the picture shows a few of them. I've made about 12 of them so far and I have about 20 more ornaments to make. It takes about 1 hour to make about 3 of them. I'm going to ask my kids to help me this weekend so I believe we should be able to finish all of them by Monday.

I'm going to create a tutorial on this ornament if you're interested. I'll post it this evening. I was so busy yesterday that I wasn't able to sit down and create the tutorial. Do you like this ornament? I think it came out pretty good but that's my opinion. What do you think?

Here's a pink/gold combo using the SU "True Friend" stamp set.


Here's a silver/purple combo. The stamped image is from the SU "Paint Prints stamp set".


Here's a butterfly design on the red glitter ball. The images are from the SU "Beautiful Butterflies" stamp set.


Because we don't have a Christmas tree right now, I hung the ornaments on this palm tree in our living room. Every year we buy two trees, one big one and one small one. The small tree (about 5 ft tall) goes into the the family room which these ornaments will be hung on. My husband wants them on the small tree. . . hmmmph, I'm a bit insulted. That's okay, I understand. . .we have a tradition of hanging our special "ornament collection" on our big tree. Each year we buy special ornaments for the kids and one family ornament. Unfortunately, my handmade ornaments don't fit the design theme.


Here's another picture at another angle. Okay. . .now back to making another 20 of these puppies. I'm going to be busy this weekend!!


Related Posts Plugin for WordPress, Blogger...
 
Share |