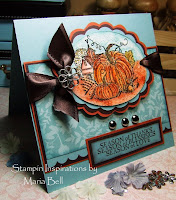
First Card With the Copic Markers
 Hi Everybody! Okay, I lied. . .I actually had time to make this card while I waited for my son to put my shelves together.
This is my first attempt to make a card using the Copic Markers. I will do my review of the markers when I have more time. You'll probably be surprised with what I have to say. . .or maybe not. . .:)
Anyway, this was a fun card to make. It took a lot of coloring and cutting but I like how it turned out. This is a great stamp set. It's really pretty.
Hopefully, I'll be able to finish up organizing my shelves and I'll take a picture of it tomorrow. If interested on the step by step instructions of this card, scroll down. See y'all later!! Close up of the flowers. As you can see they are multi-layered. I love multi-layered flowers.
Card Recipe:
Stamps: SU Time Well Spent, Circle of Friendship
Paper: I'm not sure. . .I think it's Groovy Guava or Cameo Coral, Chocolate Chip, Wild Wasabi
Ink: Copic Markers, Purely Pomegranate
Accessories: Grosgrain ribbon, Marvy round corner punch, SU 1" circle punch
1. Stamp the large flower from the SU Time Well Spent stamp set 6x on white cardstock.
2. Color each layer of the flower using the Copic Markers (Sorry, I didn't take note of the marker numbers - I'll try to remember next time)
3. Cut each flower by layers meaning start with the larger outline and continue on with the next flower outline and so on.
4. Mount each cut flower in layers using a foam tape.
5. Stamp one of the sentiment stamps from the SU Circle of Friendship stamp set inking with the Purely Pomegranate ink pad.
6. Using a 1" circle punch, punch out the sentiment.
7. Shade the edge using a sponge dauber and mount onto the center of the lower flower using a foam tape.
8. Stamp the butterfly image using Purely Pomegranate ink randomly on to the card base. 9. Mount the flowers on to a 3 1/2" x 4 3/4" Chocolate Chip cardstock, punch the corners using the round corner punch and mat onto a Wild Wasabi cardstock. Punch the corners of the mat using the round corner punch then attach to the card base.
10. Punch the corners of the card base using the round corner punch.
11. Follow the sketch and design as desired.


14 comments:
I love this card! The colors are very pretty - lots of work you put into all of your cards! I'm anxious to hear your comments about your copic markers :) hugs, Teri
This is beautiful, Maria!! :0)
oh Maria - this is so pretty. I love all the layers of the flowers, and how they pop. Yes - I want to hear about the pens too.... send me a PM - I want a personal review. haha... I can't wait!!!
Thanks for sharing!!
Hugs,
Jen
this card is awesome, love the colors and those beautiful layered flowers.
Maria:
Beautiful card as always. Thank you for the tutorial. I am definitly going to have to give this one a try this afternoon since we are expecting rain all weekend. I will be creating cards like Crazy.
Beautiful job
Carol Lee
Great card !
I heard they take practice
but looks like you got it :)
Jana
This looks like a lot of work, but WOW, it's gorgeous! I love it!
OHHHH I love your card the color edges well I love my Copics so I can not wait to see your review and this stamp set OHHHH I wish I could get my hands on it BUT I am not a SU rep. so I can only dream! lol ;)
This is just gorgeous, Maria! I love the way you cut out and colored the flowers. Can't wait to hear what you have to say about the Copics . . .
This is a very beautiful card! Great job!
This card is beautiful.
I will be anxious to hear your review on the Copic markers. I have all of the SU markers and would like to know how they compare to them.
This card is fabulous! I love the colors and I love the layers!
Maria, this card is gorgeous! I love the colors and the dimensional flowers.
Another beautiful card! I'm loving what you're doing with this stamp set! TFS.
Post a Comment