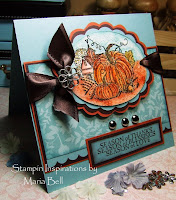
Daily Special - Anything But Cards 1

I wasn't feeling well all day but I managed to perk up a little this evening to finish this altered notebook. I bought this notebook in a bundle at Wal Mart. The notebooks already had a plaid cover so I incorporated the colors to my stamping and left a little of the plaid cover exposed.
Materials
5 x 7" notebook
Polka Dots and Paisley Stamp Set
Glossy cardstock (4 x 6" and 2 x 3")
Ballet Blue cardstock for matting
Lavender Lace Cardstock ( 3 x 4 3/4")
Pink Passion Classic ink pad
Markers: Green Galore, Tempting Turquioise, Pink Passion, Lavender Lace
Versamark
Clear embossing powder
Purple brads
Ticket Corner Punch
Designer and organdy ribbon
Heating tool
Instructions
- Ink paisley stamp using markers in pink passion and tempting turquoise
- Randomly stamp image on to 4 x 6" glossy white cardstock
- Re-ink in between stamping
- Continue to stamp randomly until satisfied with the amount of image stamped
- Ink the small flower stamp with green galore and randomly stamp image in between the paisley images then color in the flower with green galore marker
- Ink the small flower stamp with the Lavender Lace classic ink pad and randomly stamp images in between the other already stamped images
- Ink the whole cardstock with Versamark and emboss with clear embossing powder
- Stamp the dot background image on to Lavender Lace 3 x 4 3/4 cardstock using Lavender Lace Classic ink pad
- Punch the corners with ticket corner punch
- Mat on to ballet blue cardstock
- Punch holes to all four corners and attach purple brads
- Glue on to the Paisley background slightly to the left but centered vertically
- Rubber stamp 4 images of the "flower with stem" stamp using Pink Passion Classic ink pad on to the 2 x 3" glossy white cardstock
- With Green Galore Marker maker draw in leaves on the stems
- Apply Versamark all over the cardstock and heat emboss using clear embossing powder
- Mat on to ballet blue cardstock
- Tie ribbon to lower half of the image and create a bow
- Rubber stamp the sentiment on to glossy cardstock and cut the image in proportion to the stamped image.
- Apply Versamark to the whole image and heat emboss with clear embossing powder
- Mat on to ballet blue cardstock and attach to the left side of the floral image
- Attach to the dotted background slightly to the right but centered vertically
- Attach coordinating ribbons to the spiral backbone of the notebook
Use a plain notebook if you can't find this notebook at Walmart. Cover the notebook front cover with a stamped cardstock or scrapbook paper and proceed with the instructions. Alter a notebook creating your own design. It's like creating a card but design is attached to a notebook rather than a card base!
Ahhhh. . .mission accomplished.
Goodnight folks! Until later. . .


No comments:
Post a Comment