Random Card - Look What I Did With A Mistake
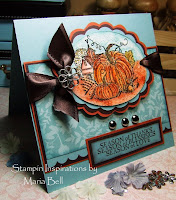
Yup, the way the image bulge out was a "mistake". I had cut and matted the primary image too large by mistake and the intention was to slip it between the slit created by the "slit" punch. Because the slits were too close together, when I slipped the image through both slits, it bulged. BUT! I thought it looked cool. . .it looked very 3D so I decided to keep it that way.
I slipped a ribbon through the back and tied it on one side. See. . .it's okay to make mistakes sometimes. There's always a way to fix a mistake and sometimes, it can end up to be a technique. Trust me, I've made a few boo-boos which ended up being techniques that I still use.
Oh by the way, I'm working on my "B" stamp sets. I'm done with "A" sets. I actually have more "A" sets but I'm working on the ones that are stored in my craft room. I'll circulate the stamp sets so I can actually use all of them.
Stamping Tip:
To enhance detailed parts of your image, add a little Crystal Effects to make them pop. You can see that some of the flowers appear 3D. I added Crystal Effects to some of the flowers and to the top of the dress to create this effect.
Card Details:
Stamp Set: Blooming With Happiness
Paper: Bliss Blue, Not Quite Navy, DCWV Scrapbook Paper
Ink: Pastels and markers
Accessories: Crystal Effects, Slit punch, brad, Basic Basic ribbon, Ticket Corner Punch
This is how the front looks. . .

Until later. . .


2 comments:
Terrific creation!
I have a question for you. What program do you use to make your sketches in? I would love to learn how. Thanks for the wonderful blog....Keep up the good work.
Post a Comment