Random Cards - Doodle This - Lumiere with Classic Ink

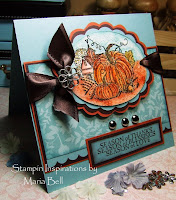
I finally mounted the "Doodle This" stamp set! Whoohoo. I'm always behind on the new sets because I'll buy them then not mount them for weeks or even months. I have sets that I bought months ago that I still haven't used. I'm trying to be better at using them but there's only so many cards and projects that a person can make in a day.
I love, love, love. . .did I say love. . .this stamp set. I love stamps that I can color in because that's my favorite part of stamping. This is when your unique style can show through.
You can't tell by the picture but the colors are shimmery. I did it by using Lumiere and Classic Ink. I did a tutorial on this technique a few weeks ago. I added a different element by adding water to my aqua painter and colored the images like watercolor.
Did you know that acrylic paint can be treated like watercolor if you add water to your brush? You can mix colors to create your own colors.
Click here to be linked to the tutorial. When following the tutorial be sure to use an aqua painter or watercolor brush with water when painting in the images.
The background was inked with vanilla craft ink, then heat embossed with white embossing powder. You can use Versamark in place of the vanilla craft ink. I then added extra dots using white gel pen so it shows up on the dark paper. I also did the same thing when coloring in the background images.
To add the frame I used gold leaf pen. You can use metallic pen. . .it works the same way.
To create the leaves. . .I stamped the flower and cut out a petal and used it as a leaf. The stamp set don't come with leaves so when you need to. . .improvise.
Scroll down for the other card I made and the sketch challenge.
Card #1 detail:
Stamp set: Doodle This, Everyday Flexible Phrases
Paper: Chocolate Chip, Positively Pink, Old Olive
Ink: Lumiere with Positively Pink Classic Ink, Vanilla Craft Ink, Sakura 3D opaque pens, Prismacolor pencils with Gamsol, Bravo Burgundy
Accessories: Round Tab Punch, American Craft Elements Ribbon, White Embossing Powder, Gold Leaf Pen
Here is the sketch challenge for card #1. Yup, very, very simple layout. It's what images and embellishments that make the card pretty.
Card #2:
I used the same coloring technique as the first card and basically used the same coloring materials. I snipped the corners of the designer paper then mounted the paper on to the cardstock. It's not a punch. It just looks like the corners were created with a punch. I then added brads to embellish it. I shaped the edge of the card base using a Fiskar template. Beats having to use a punch to create the scallop edge. There is a technique to create this edge using the slit punch. I'll do a tutorial when I have a chance.
Card #2 detail:
Stamp set: Doodle This, Love Matters
Paper: Bordering Blue, Positively Pink, Colorbox Designer Paper
Ink: Bordering Blue, Positively Pink, Sakura 3D Opaque pen, vanilla craft ink, Prismacolor Pencils with Gamsol
Accessories: Silver brads, organdy ribbon, white embossing powder, Fiskar circle template (contains the scalloped edge)
Try this sketch challenge and remember have fun doing it!
Until later. . .


5 comments:
Super cards! and thanks for the sketches - will add to my to do list!
Gorgeous Cards. Thank for the great instructions. I'm trying to keep track of both your blogs. You are a very busy lady!
These are just absolutely gorgeous cards~!! Very well done.
Maria,
Your blog is great and your cards and work are beautiful. I was excited to find you through your post on the SU Friends group. Great job. I am inspired to get stamping! I can't wait for Spring break next week!
Beautiful. Love the colors and the coloring. I am getting this stamp set on Monday so I am really excited. :o) TFS!
Post a Comment