Slit Flower Frame Video and Written Tutorial
Hello Friends!! I'll call all of you friends from now on, okay! LOL! I've been exercising daily (treadmill and elliptical machine) and I can't say I'm enjoying myself.
Is there any one you envy? You'll probably be surprised with my answer. It's not rich people, beautiful people, talented people or successful people that I envy. I envy people who love to exercise, go hiking, skiing, and all those outdoor activities. . . .all healthy and full of energy. I wish I could love exercising and doing all those fun stuff. I would be healthy, I would have energy, and I would probably be tone and thin. LOL!! I also wish I could be a vegetarian. Seriously.. ..I look at them and I do wish I was like those healthy people. LOL!! I really do admire them. How do I get to be like them? I do try and I am so not enjoying myself. . .whenever I exercise my legs hurt, my body hurts, and it makes me hungry. LOL!

Anyway. . .I created the video tutorial above a while ago and the written tutorial over a year ago. If you take a look at the written tutorial below, you'll see that my photographic skills have improved. LOL!
Actually, it's not my skills that have improved, it's my camera. It really helps to have a good camera.
All of my written tutorials in the past have been stored on a host web site which I pay for and to reduce my expenses, I want to discontinue the web site so I'm slowly transferring my old written tutorials to my blog site so you'll be seeing more tutorials on my blog that you may have seen before but I'll be adding new and updated cards to show in conjunction with the old tutorials.
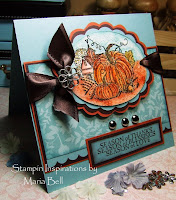
Today's tutorial is on creating this flower frame shown on my card. It's very simple to do. The video tutorials slightly varies from my written tutorial in the size of the card stock that I used but it's the same basic concept.
 With my current card, I used designer paper rather than card stock and I detached the flower frame from the base which you can do if you punch each petal closer together so that it separates from the base card stock or designer paper.
To create the faux stitching, I used a Sakura opaque gel pen and just drew them on. Very simple.
I colored my image using my Copic Markers and added a bit of Stickles to the flowers. That's about it.
Anyway, try out the tutorial and if you do create a card, let me know, I'd like to see what you created!!

Card Details:
Stamps: The Paper Company (sentiment)
Paper: Autumn Leaves designer paper, SU Cameo Coral, Green Galore
Ink: Copic Markers, Sakura Opaque gel pen
Accessories: SU Slit Punch, Key Tag Punch, Making Memories ribbon, Prima flowers, JoAnn brads, Coluzzle Circle template
 After punching or cutting a 3" circle through the card stock, with you slit punch, create the petals around the reverse of the punched circle.
When punching around the circle, leave approximately 1/8" space from the edge of the circle and between each slit punch. Allowing the space ensure that you don't completely cut out the flower.
Optional: If you want to cut out the flower completely, punch the slits close together, touching one another with each punch so that it can completely cut off from the base to create a separate flower punch.

After punching with the slit punch, your flower should appear like this, still intact with the base. Pull each punched petals a little forward so that it appears 3D
 Optional: To make the punched flower more prominent, color the edge of each petal by inking it with a sponge dauber

Optional: To embellish the flower, add dots to each petal using an opaque gel pen and add leaves with a sentiment stamped on to it.
Is there any one you envy? You'll probably be surprised with my answer. It's not rich people, beautiful people, talented people or successful people that I envy. I envy people who love to exercise, go hiking, skiing, and all those outdoor activities. . . .all healthy and full of energy. I wish I could love exercising and doing all those fun stuff. I would be healthy, I would have energy, and I would probably be tone and thin. LOL!! I also wish I could be a vegetarian. Seriously.. ..I look at them and I do wish I was like those healthy people. LOL!! I really do admire them. How do I get to be like them? I do try and I am so not enjoying myself. . .whenever I exercise my legs hurt, my body hurts, and it makes me hungry. LOL!

Anyway. . .I created the video tutorial above a while ago and the written tutorial over a year ago. If you take a look at the written tutorial below, you'll see that my photographic skills have improved. LOL!
Actually, it's not my skills that have improved, it's my camera. It really helps to have a good camera.
All of my written tutorials in the past have been stored on a host web site which I pay for and to reduce my expenses, I want to discontinue the web site so I'm slowly transferring my old written tutorials to my blog site so you'll be seeing more tutorials on my blog that you may have seen before but I'll be adding new and updated cards to show in conjunction with the old tutorials.
Today's tutorial is on creating this flower frame shown on my card. It's very simple to do. The video tutorials slightly varies from my written tutorial in the size of the card stock that I used but it's the same basic concept.
 With my current card, I used designer paper rather than card stock and I detached the flower frame from the base which you can do if you punch each petal closer together so that it separates from the base card stock or designer paper.
To create the faux stitching, I used a Sakura opaque gel pen and just drew them on. Very simple.
I colored my image using my Copic Markers and added a bit of Stickles to the flowers. That's about it.
Anyway, try out the tutorial and if you do create a card, let me know, I'd like to see what you created!!

Card Details:
Stamps: The Paper Company (sentiment)
Paper: Autumn Leaves designer paper, SU Cameo Coral, Green Galore
Ink: Copic Markers, Sakura Opaque gel pen
Accessories: SU Slit Punch, Key Tag Punch, Making Memories ribbon, Prima flowers, JoAnn brads, Coluzzle Circle template
Slit Flower Frame Tutorial
Materials
Card Base (4 1/4" x 5 1/2")
Card stock (4 1/8" x 5 3/8")
4 x 4" white card stock
3" circle punch or shape cutter (Colozzule, Fiskar, etc. . .)
Stampin Up Slit Punch
Foam tape or dimensionals
Sponge dauber and scissors (optional)
Rubber stamps and Embellishments
 After punching or cutting a 3" circle through the card stock, with you slit punch, create the petals around the reverse of the punched circle.
When punching around the circle, leave approximately 1/8" space from the edge of the circle and between each slit punch. Allowing the space ensure that you don't completely cut out the flower.
Optional: If you want to cut out the flower completely, punch the slits close together, touching one another with each punch so that it can completely cut off from the base to create a separate flower punch.

After punching with the slit punch, your flower should appear like this, still intact with the base. Pull each punched petals a little forward so that it appears 3D
 Optional: To make the punched flower more prominent, color the edge of each petal by inking it with a sponge dauber
Optional: To embellish the flower, add dots to each petal using an opaque gel pen and add leaves with a sentiment stamped on to it.


12 comments:
Oh you are so creative Maria and love the flower you designed, I can't wait to see more of your tutorials, I never thought I needed any of the round SU punches but see I do now, Your colouring is gorgeous as always and love the wonderful colours of your card, Hope you have a great weekend, Big Hugs, Nikki x
Maria,
This tutorial is great!!!
I really love it!! I am going to have to teach a version of this to my club some time because I always strugle with how to use that punch!!! So good!!!
I hear you on the exorcise thing! I need to loose some weight and feel better about myself, but I hate exorcising like with a mega huge passion I hate it!!!!
Janna and I were just on the phone for our daily chat session and we were talking about exorcising and hating it, and I actually went today and purchased 3 seperate Exorsize video things that have 5 and 10 minute exorsize routines on them so I can try to get thru 10 min. because I can NOT do the 40 min and 1hr ones CAN NOT!!!!
Thanks for sharing it is good to know there are others out there!!!!
Heather
You are so creative, Maria! Very cute flower frame! And thank you so much for your wonderful tutorial!!!
This tutorial is awesome!! I love the way you made the flower frame - just too clever!
Maria you are so clever. i love this... i will definitely use this one... thank you for a fabulous tutorial... have a great weekend crafty hugs Tina
How cool is this!?! Might have to give this a try.
Come by my blog...you have been tagged! :0)
WOW!!
your cards ant toturials are amazing!
Fabulous projects! I love your tutorials. They're so thorough and easy to follow. Thanks!
This is so cool!! I never would have thought of this! I just love your tutorials. You do such a great job on them and of course your cards are just stunning!! How cool is it that the card has dimension on the petals!! I am just blown away!! I love everything about it. I know I am going to have to try this!
Smiles,
janna
Hey Maria, in fact I recall seeing your written tutorial in the past. I think I gave it a try but...mine looked nowhere like yours(sighhhhhhhhh). Green is one of my most fav. colors. So...you know, I love your card =)
Maria,
Love how you used the punch to create a flower!! I think this is something I need to try this weekend.
Cynthia:)
Great tutorial and pretty card!
Post a Comment